


Agenda
Introduction to this post and concepts needed
Preparing our Environment
Attack the server
Defend the server (on the next page)
Installing Wazuh-agent (on the next page)
Wazuh server configuration (on the next page)
Make a new attack (on the next page)
Analyze events (on the next page)
Further tasks (on the next page)
Wrap up (on the next page)
1 - Introduction
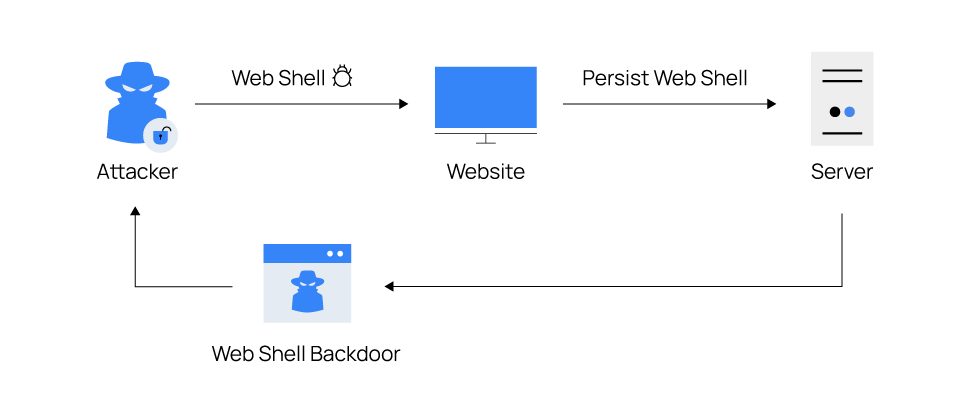
In this tutorial, we're going to analyze a straightforward scenario where we're going to understand a web shell and how we can prevent it through Wazuh.
1.1 Web shell
Let's review what a web shell is, it's a technique that the attackers use to access our web server and run code into it. Web shells are generally written in programming languages supported by the victim web servers. Examples of supported languages include PHP, ASP, ASP.NET, Perl, Python, Ruby, Java, and Unix shell scripts.
In most cases, the servers that have IIS (Internet Information Services), Apache (WAMPP, XAMPP, LAMP), NGNIX, or WordPress, are more likely to be attacked
These cyber attackers can get a foothold on a web server by exploiting application vulnerabilities or system misconfigurations via attacks such as SQL injection (SQLi), cross-site scripting (XSS), remote file inclusion (RFI), etc.
Once cyber attackers have access to our server, they usually run commands, exfiltrate data, upload malware, and change our files.
Common indicators of web shells
Recently uploaded or modified files.
Unusual network connections.
Misconfigurations and modified headers
Obfuscation techniques.
In this post, we're going to use PHP as the language to be used on our server and as the attacker's script.
1.2 Wazuh
Summary 1 - Introduction
2 - Preparing our Environment
We're going to use:
1 . Ubuntu server VM (pc1): as server web is written in PHP.
2 . Ubuntu pc (pc2) to attack the server.
3 . Ubuntu server VM (pc3): to run our Wazuh docker instance.
2.1 - Step 1: Setup our Apache web server (pc1)
In this step, we assume that you have a freshly installed Ubuntu SO in a virtual machine.
2.1.1 First of all, update the system operating
$ sudo apt-get update
# apt-get update
(if yor're logged in as sudo user)

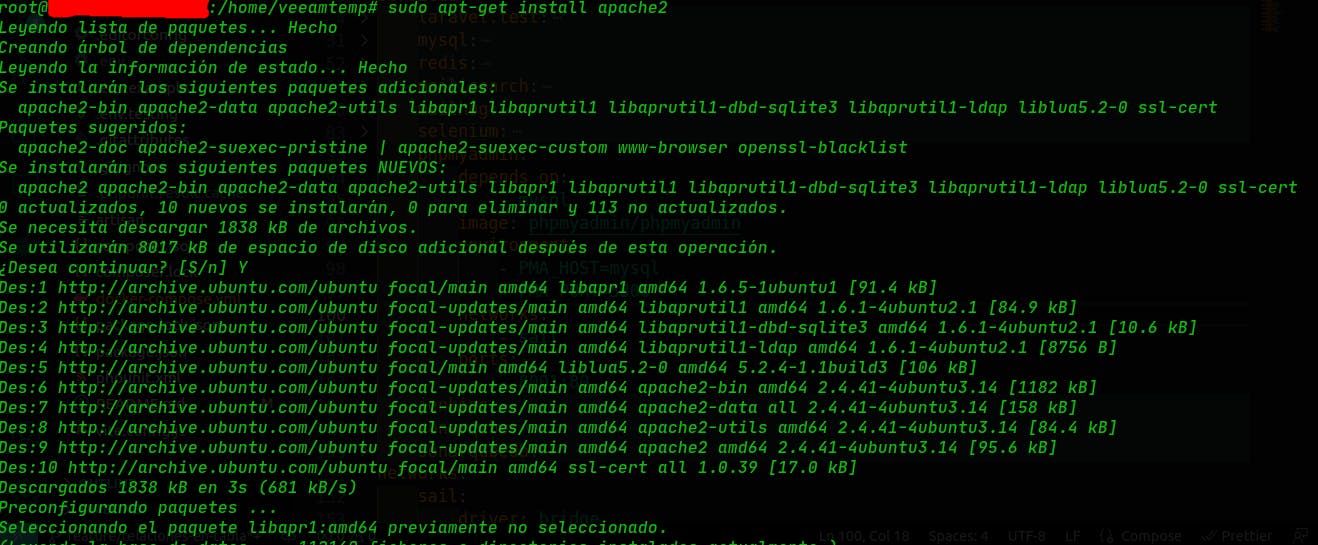
2.1.2 Install the Apache web server to serve a web application with the following commands:
$ sudo apt-get install apache2
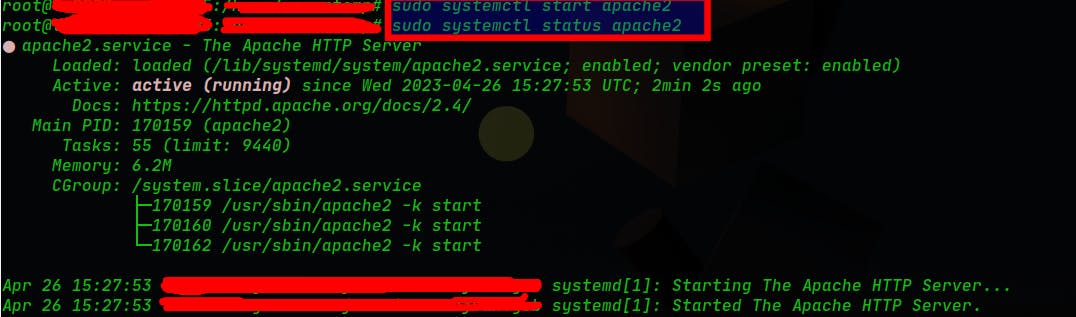
Then we need to start the service (1st command) and check if it's running (2nd command):
sudo systemctl start apache2
sudo systemctl status apache2
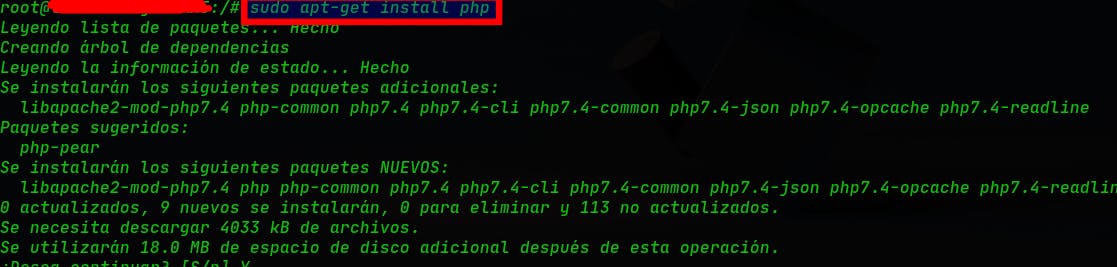
2.1.3 Install PHP 8.1 to run PHP applications:
sudo apt-get install php7.4
php --version

2.1.4 To verify the installation, visit the URL: http://<my-ip> to see the Apache web server homepage.
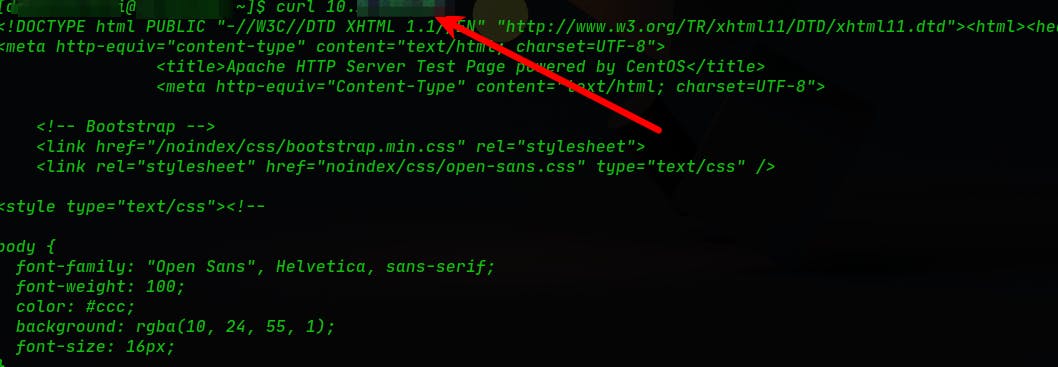
Then we check the access to the page from other PC in our networking, and we should able to see this:
2.1.5 copy our PHP files and permit a folder, with this:
ssh to the web server f.e.: ssh root@serverIP
sudo su #if you logged in with a different user
cd /var/www/html
git clone https://github.com/diegocheca/reverse-shell-example.git .
chmod 777 -R /var/www/html/uploaded_file
Summary 2 - Preparing our environment
3 - Attack scenario (pc2)
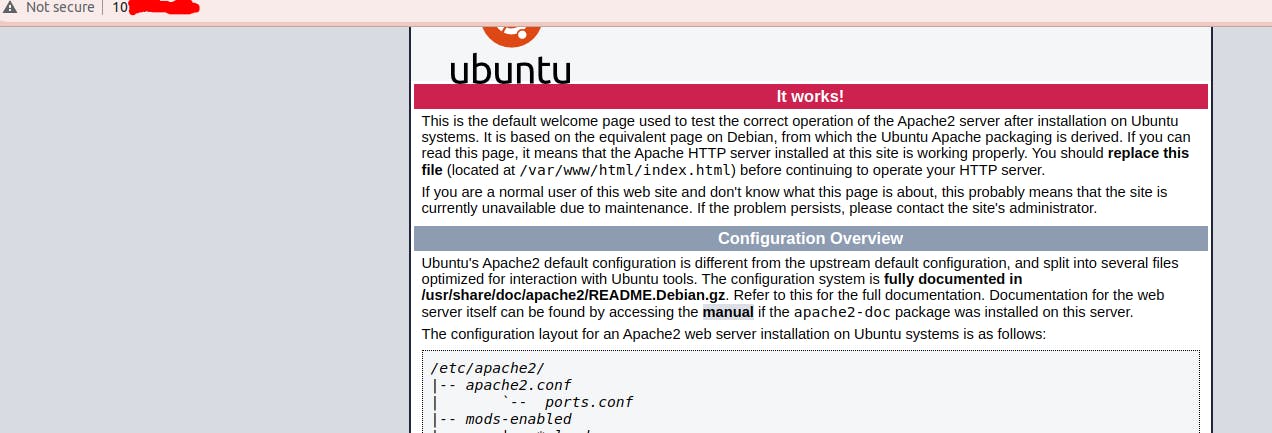
First of all, we can test our web page on a browser, like this:
:
It's working, go ahead.
As web shells are post-exploitation malware, we assume that the attacker has initial access to the endpoints. The cyber attacker’s goal is to maintain persistence on the compromised web server and perform post-exploitation activities, including the ability to add, execute, and delete files, create reverse shells, and command execution.
So, please notice that there are many ways to carry out a shell reverse. It's important to prevent it.
3.1 Step 1: install Gobuster to scan the server's directory exposes in its URL
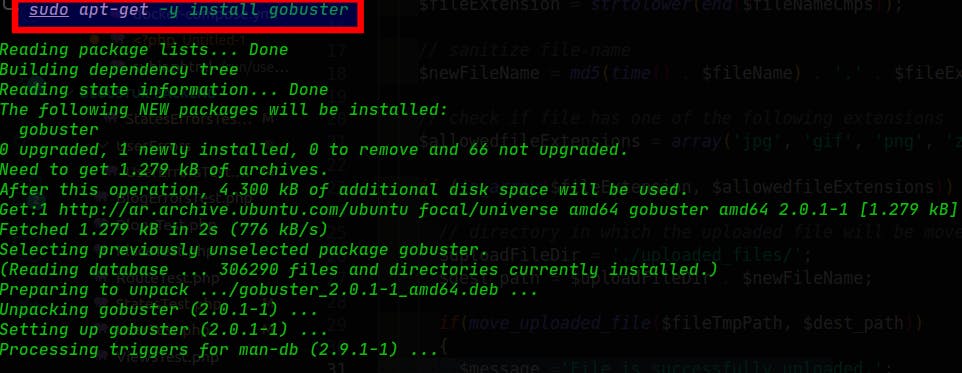

By default Gobuster doesn't have the wordlist when it's installed by apt-get package. So we must download it here and put it into this folder:
/user/share/wordlists/directory-list-2.3-small.txt
Note: this doesn't apply in Kali Linux, it comes with Wordlist already installed.
Finally, we run the Gobuster command to figure out the folders on the server:
gobuster -u WEB-SERVER-IP -w /usr/share/wordlists/dirbuster/directory-list-2.3-small.txt
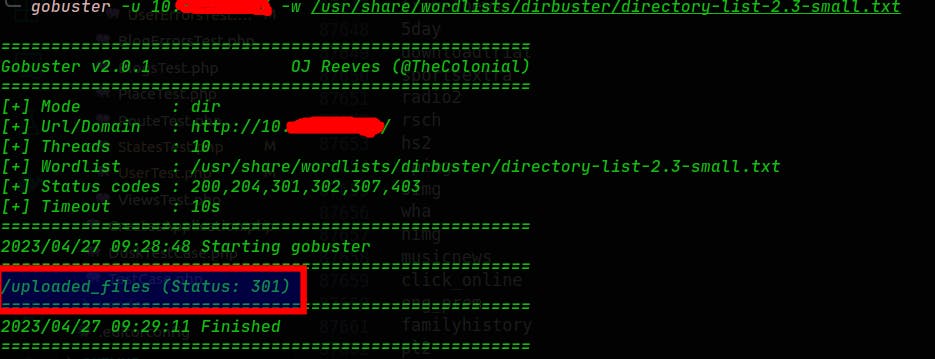
As we can see in the above image, there is a list with the folders directory available on the web server. In our case, there is only one folder called: "/uploaded_files". Notice that we should access it through its URL to know if it's possible to see its content. Let's do it:
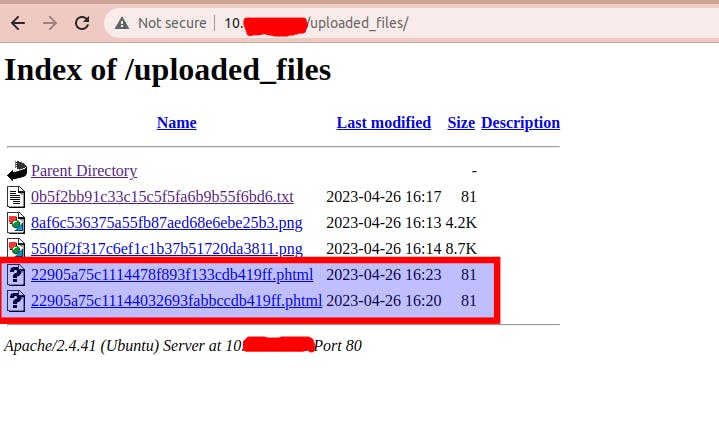
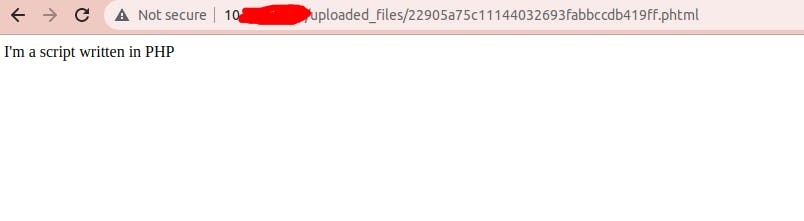
This server encrypts the name of the file but not the extensions. Keeping into account that our script has the extension ".phtml" we know that could be one of the above files, this is why need to access and click on them one by one, one and try to run them through our browser. As result:
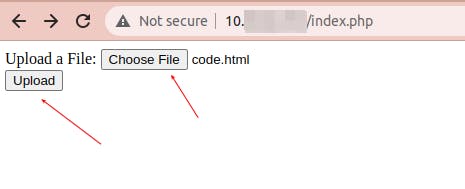
We this result we can modify our PHP file to explore further the directory folder of the server. Let's modify our PHP file (with "phtml" extension) to be uploaded.
We could use this page: https://www.revshells.com/ to generate a reverse shell script adjusted to our needs.
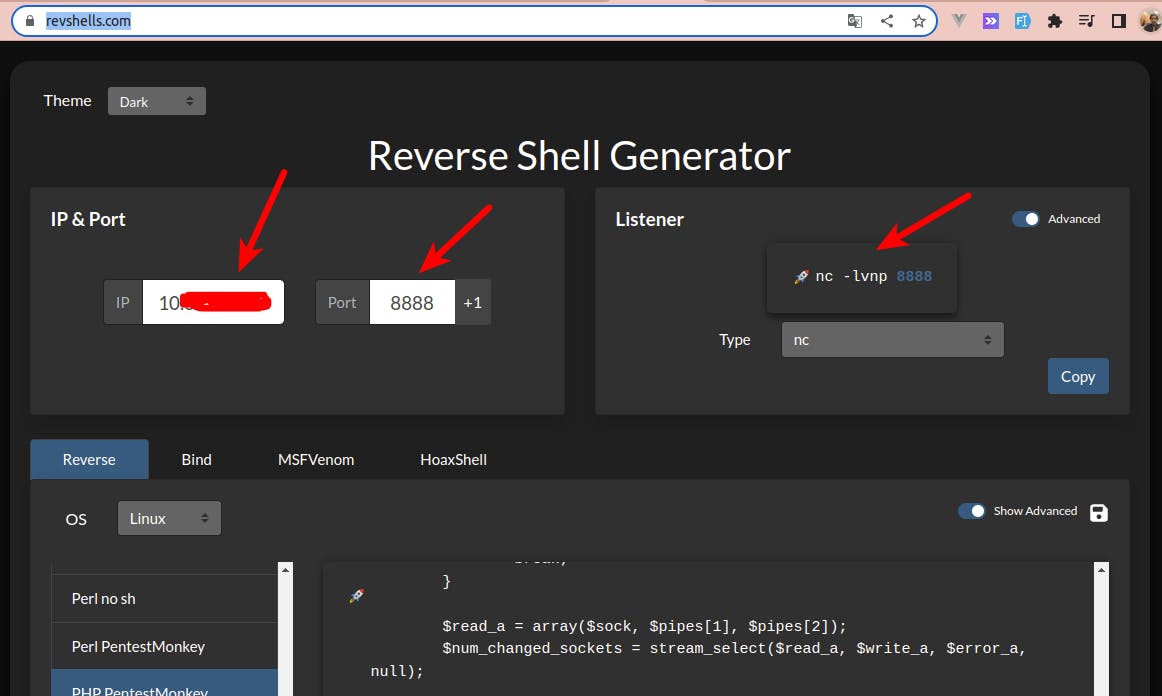

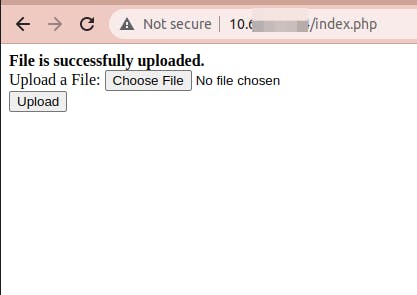
then we need to modify our PHP file with this content and upload it again.
After we access our PHP file with this code, the server is listening to the port that we have written in the PHP code. So it's possible to connect to that port through our attacker's computer
nc SERVER-WEB-IP 8888

This command lets us run some commands from our attacker's computer into in victim's computer.
At this spot, we have access to their bash which is catastrophic from a security point of view. The next steps are not analyzed in this tutorial, they'll be:
List of users on the server
Privilege escalation.
All of this is through Netcat tool.
So, here we consider that this attack was a success and move on to the defense section.
3.1 Conclusion
You might be wondering: who the hell uses a server PHP with any security restriction like this nowadays? Well, it's just a straightforward scenario to understand easier. Besides, take into account that you use a more sophisticated way to defend your server, whereas attackers use a more sophisticated way to attack it.
So it's a good idea to consider that your server is always at risk, no matter with techniques you're using to defend it.
Summary 3 - Attack the server
Link to the next post here